bios-dump
MX25L8005 Dump
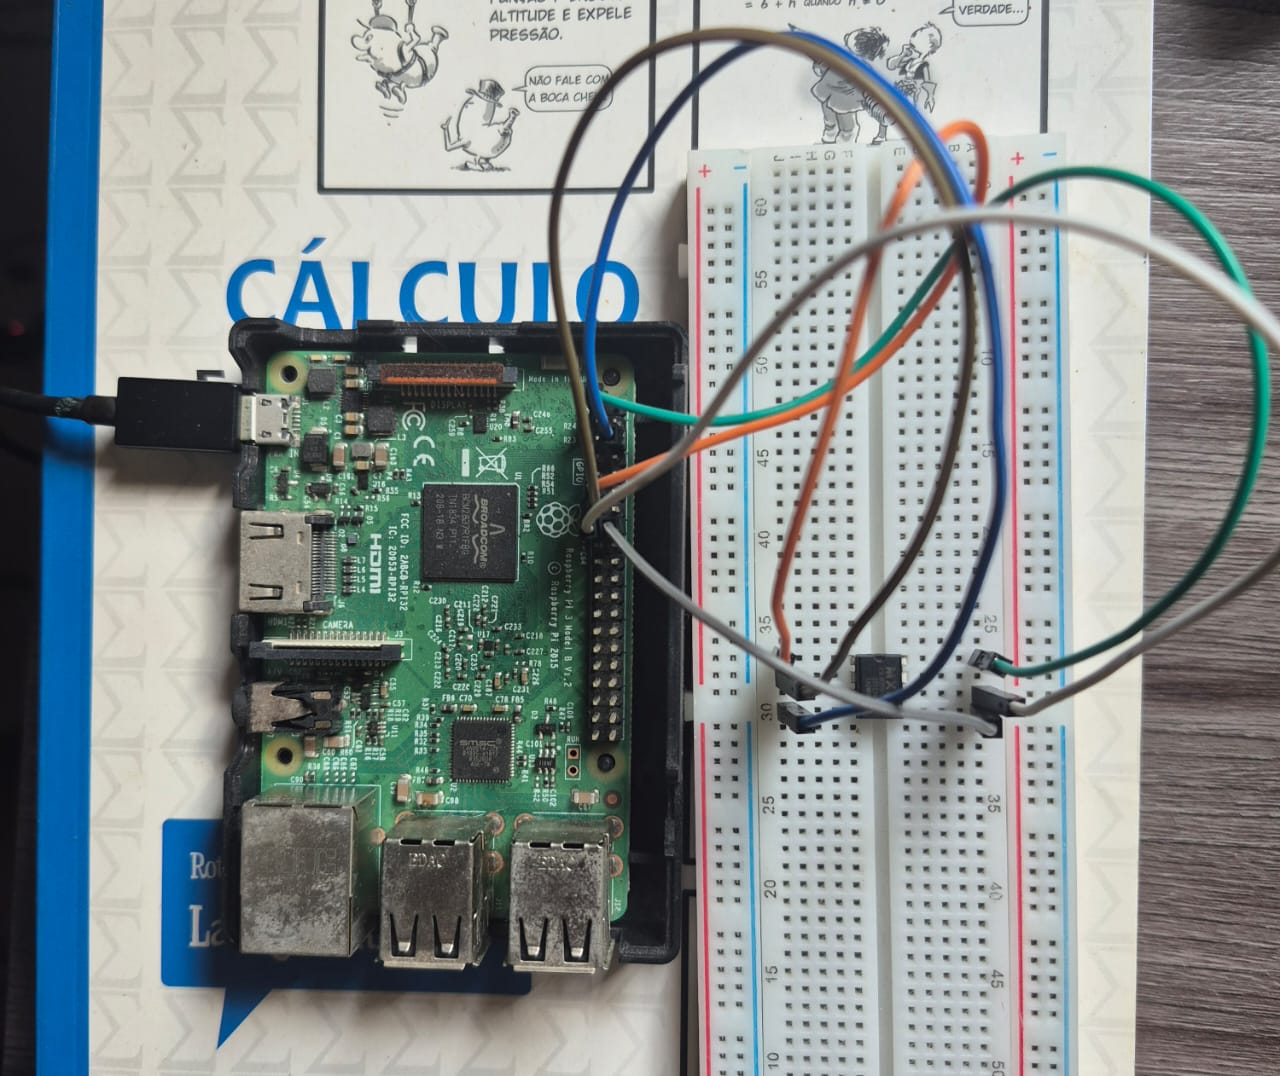
Recently, I found this old BIOS chip laying around, and I got an idea to dump its data.
With my raspberry pi 3b+, I did some experiments extracting data and I want to document it here.
The first thing I did, was to check the datasheet from micronix, which can be found here: datasheet.
After setting my environment, I tested two python scripts and then flashrom to extract its firmware.
Python scripts
This is the not recommended method, since it can mess up with the data due to differences in timing. Once I was using ubuntu on my raspberry pi, the scheduling, the script latency and many other factors contributed to a poor dump. But it still a nice experiment.
To run it, type:
chmod +x setup-linux.sh
./setup-linux.sh

python dump-RDID.py # to dump manufacture and device ID
python dump-data.py # to dump the firmware bit by bit
Notice that it requires Python 3.12. Also, the version of ubuntu I was using is Ubuntu 24.04.3 LTS.
For this setup the used pins were:
| GPIO | chip pin |
|---|---|
| 11(GPIO 17) | CS |
| 13(GPIO 27) | SO |
| 15(GPIO 22) | SCLK |
| 16(GPIO 23) | SI |
| 1(3.3V) | 3.3V(VCC) |
| 6(GND) | GND |
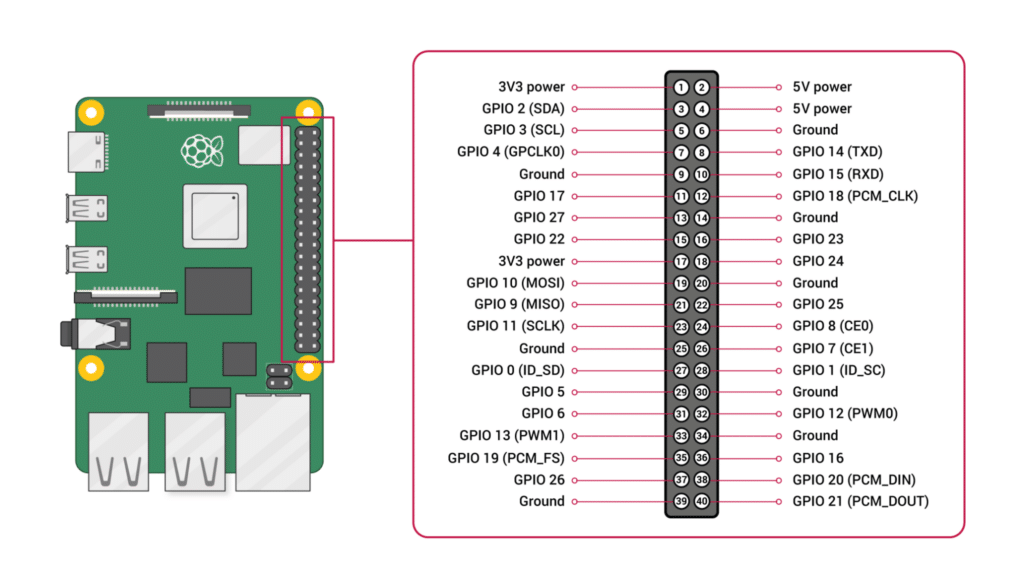
Just to ensure, these are the Raspbery Pi 3b+ GPIOS:
Flashrom
The flashrom method is more recommended, since it uses SPI directly without relying on python or other APIs.
For this method, you must setup the environment.
- check if SPI dev is there
ls /dev/spidev*
Usually, if you’re using raspbian You’ll may need to run first:
sudo raspi-config
# Interface Options → SPI → Enable
sudo reboot
- install flashrom
sudo apt install flashrom
- run the script
chmod +x dump-flashrom.sh
./dump-flashrom.sh
The pins used for this case are:
| GPIO | chip pin |
|---|---|
| 24(GPIO 8) | CS |
| 21(GPIO 9) | SO |
| 23(GPIO 11) | SCLK |
| 19(GPIO 10) | SI |
| 1(3.3V) | 3.3V(VCC) |
| 6(GND) | GND |